
 The hardware settings for each rectifier can be reached by clicking the settings button on the rectifier group in question. The hardware tab is the furthest right tab in the settings window.
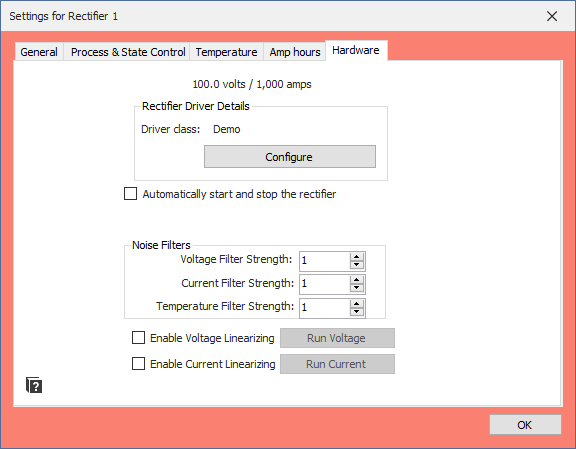
On the Hardware tab, there are several notable features. At the very top, the maximum voltage and amperage for the rectifier is displayed. Under that, there is a button to configure the driver of that particular rectifier. See Configuring Hardware for more information on setting up your rectifier’s configuration.
Below this is a check box to control whether the rectifier will automatically start and stop when running a program. This feature is only supported for some rectifiers.
Next is the filter settings. These values control how the graph displays on the rectifier screen, and does not have any effect on the rectifier’s output. The larger the filter value is, the smoother the graph will be. If you notice too much noise on your outputs, try setting this value higher. However, the higher the filter values are set to, the slower the rectifier graphs will respond to output changes. Again, these values will not change the output of the rectifier, they are simply there to make the graphs more readable.
Lastly, a the options for linearization. This feature aids in keeping the rectifier output accurate to Control It program outputs. Visit Linearizing Rectifiers to learn more about this process.